API Autodiscovery in Anypoint Platform 2

Michael T
Last Update 3 years ago
Introduction
With the release of Anypoint Platform 2, there are some changes in the API Autodiscovery feature. Here in this short article, I am going to describe how to make use of it in your applications.
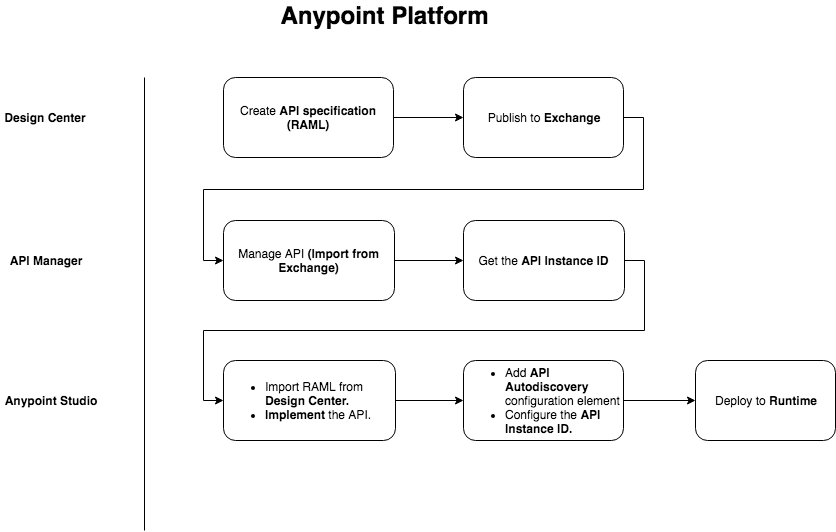
API Road Map
This is the basic roadmap for API development in Anypoint Platform. I am not going to explain all the steps except the API Manager.
What is API Instance?
Imagine the Java class paradigm. Multiple objects can be created from a single Java class. Approximately the same principle applies to this API instance concept. Let's suppose that our API (The RAML specs that we created in Design Center and published in the Exchange as an asset) is the Java class. Now we can create multiple instances from the API in multiple environments. Just imagine something as shown below to get an idea.
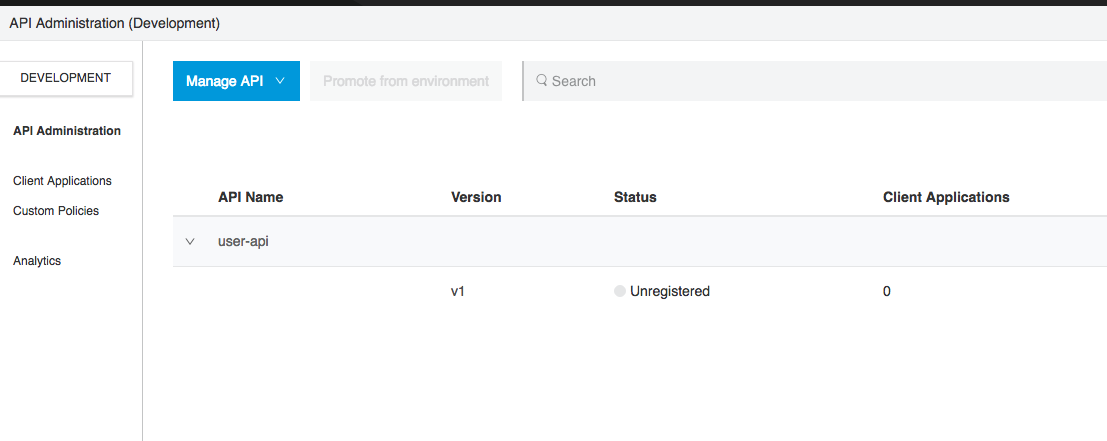
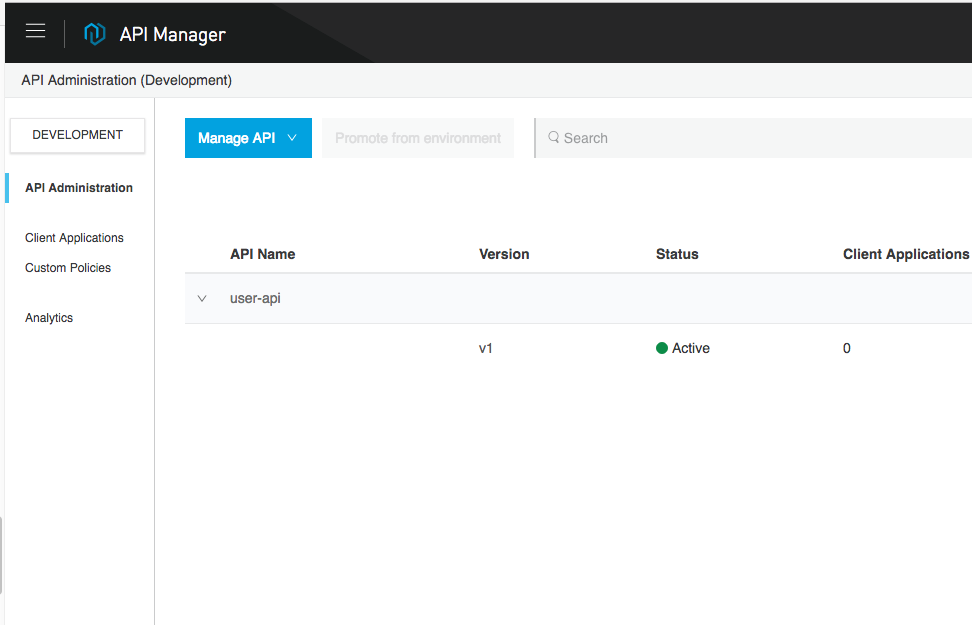
API Manager
This is the most important tool for managing (governing) the APIs. An API, to be managed, must have an instance created, and this instance must be associated with an actual implementation of the API. Also, to apply necessary security policies the API instance is a must need.
Note: Previously, in Anypoint Platform 1, there was the concept of creating a proxy for the API to manage it, but now, with the new version of Anypoint Platform, it can be done through the API instance. It means that you do not need to explicitly create a proxy only to apply some policy. Now you can directly apply the policies on the API instance.
So, here is a screenshot to create an API instance,
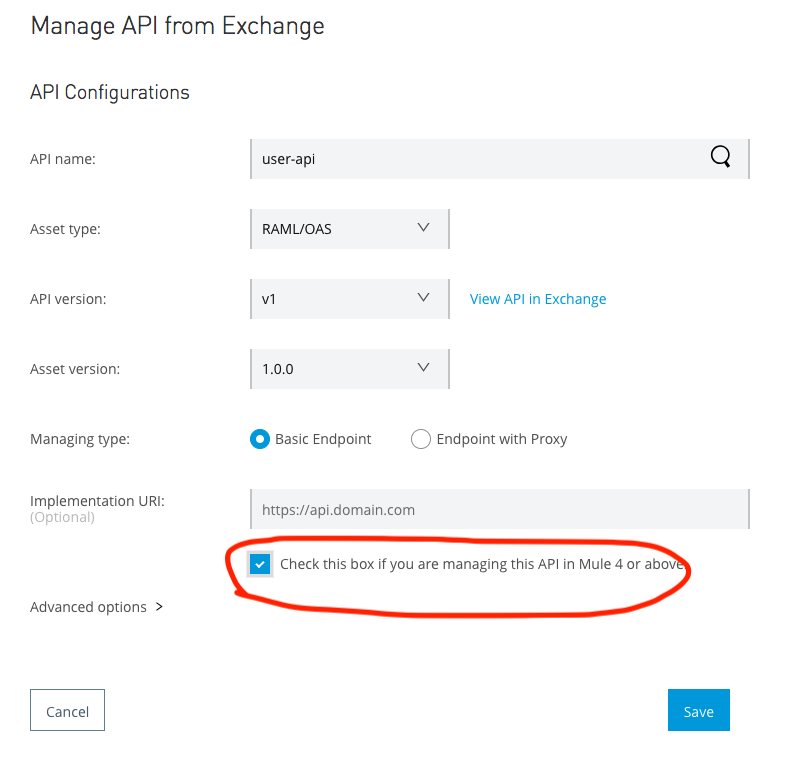
Most important part is to mark the checkbox. Once you save the API instance is created as shown below:
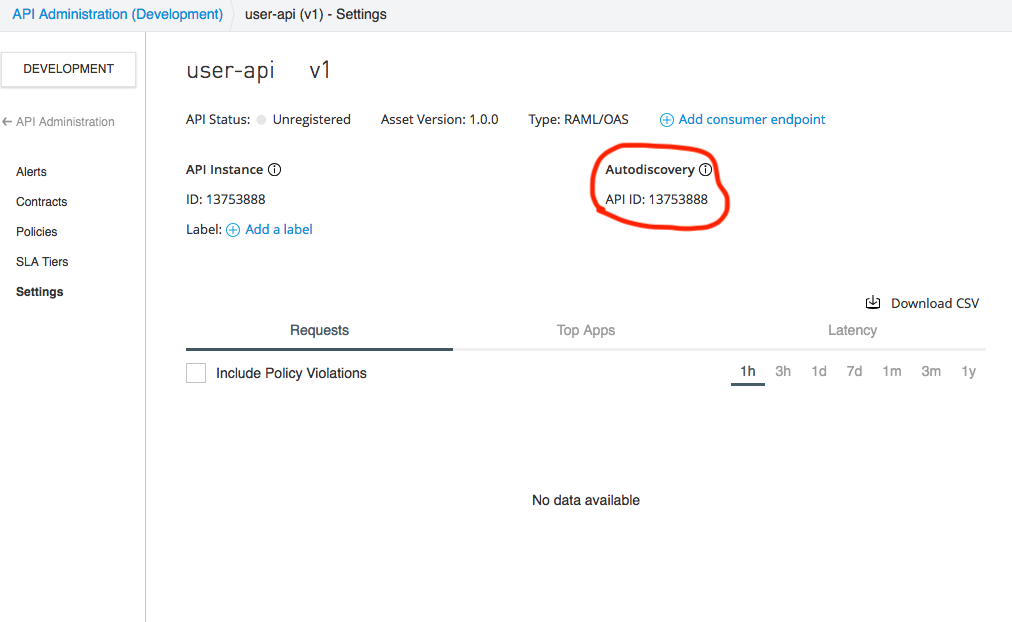
This is the most important part of API auto-discovery. You can create more than one instance of the same API. Once the API instance is created you can have the instance ID as shown above.
At this stage, your API instance is not managed. (Status is shown as unregistered). It means that until now it has not yet been associated with an actual implementation.
Anypoint Studio
After API specification is ready you can import it directly from the Design Center in the Anypoint Studio. Now, configure an API auto-discovery global element and provide it with the API Instance ID.

Runtime Manager
Once the implementation is complete, publish it to Runtime Manager. Before deploying, just make sure that you configure the following properties. This is the most important part, otherwise, your API will not be managed.
Note: The client_id & client_secret are the credentials of your master organization or Business Group for whom you are developing the APIs.
Once the application is up and running, you can see the status of the API as active in the API manager.
What's the Use of it?
You can create various instances of the same API and apply different policies to them separately. Please check the documentation.
How to Use it?
It's kind of hit and miss to find out how to make proper use of it as the official documentation of Mule has not provided yet a proper roadmap of API development. So, here are the basic steps you need to do. (Please read my previous article for more detail).
Step 1
Create an instance of the API.
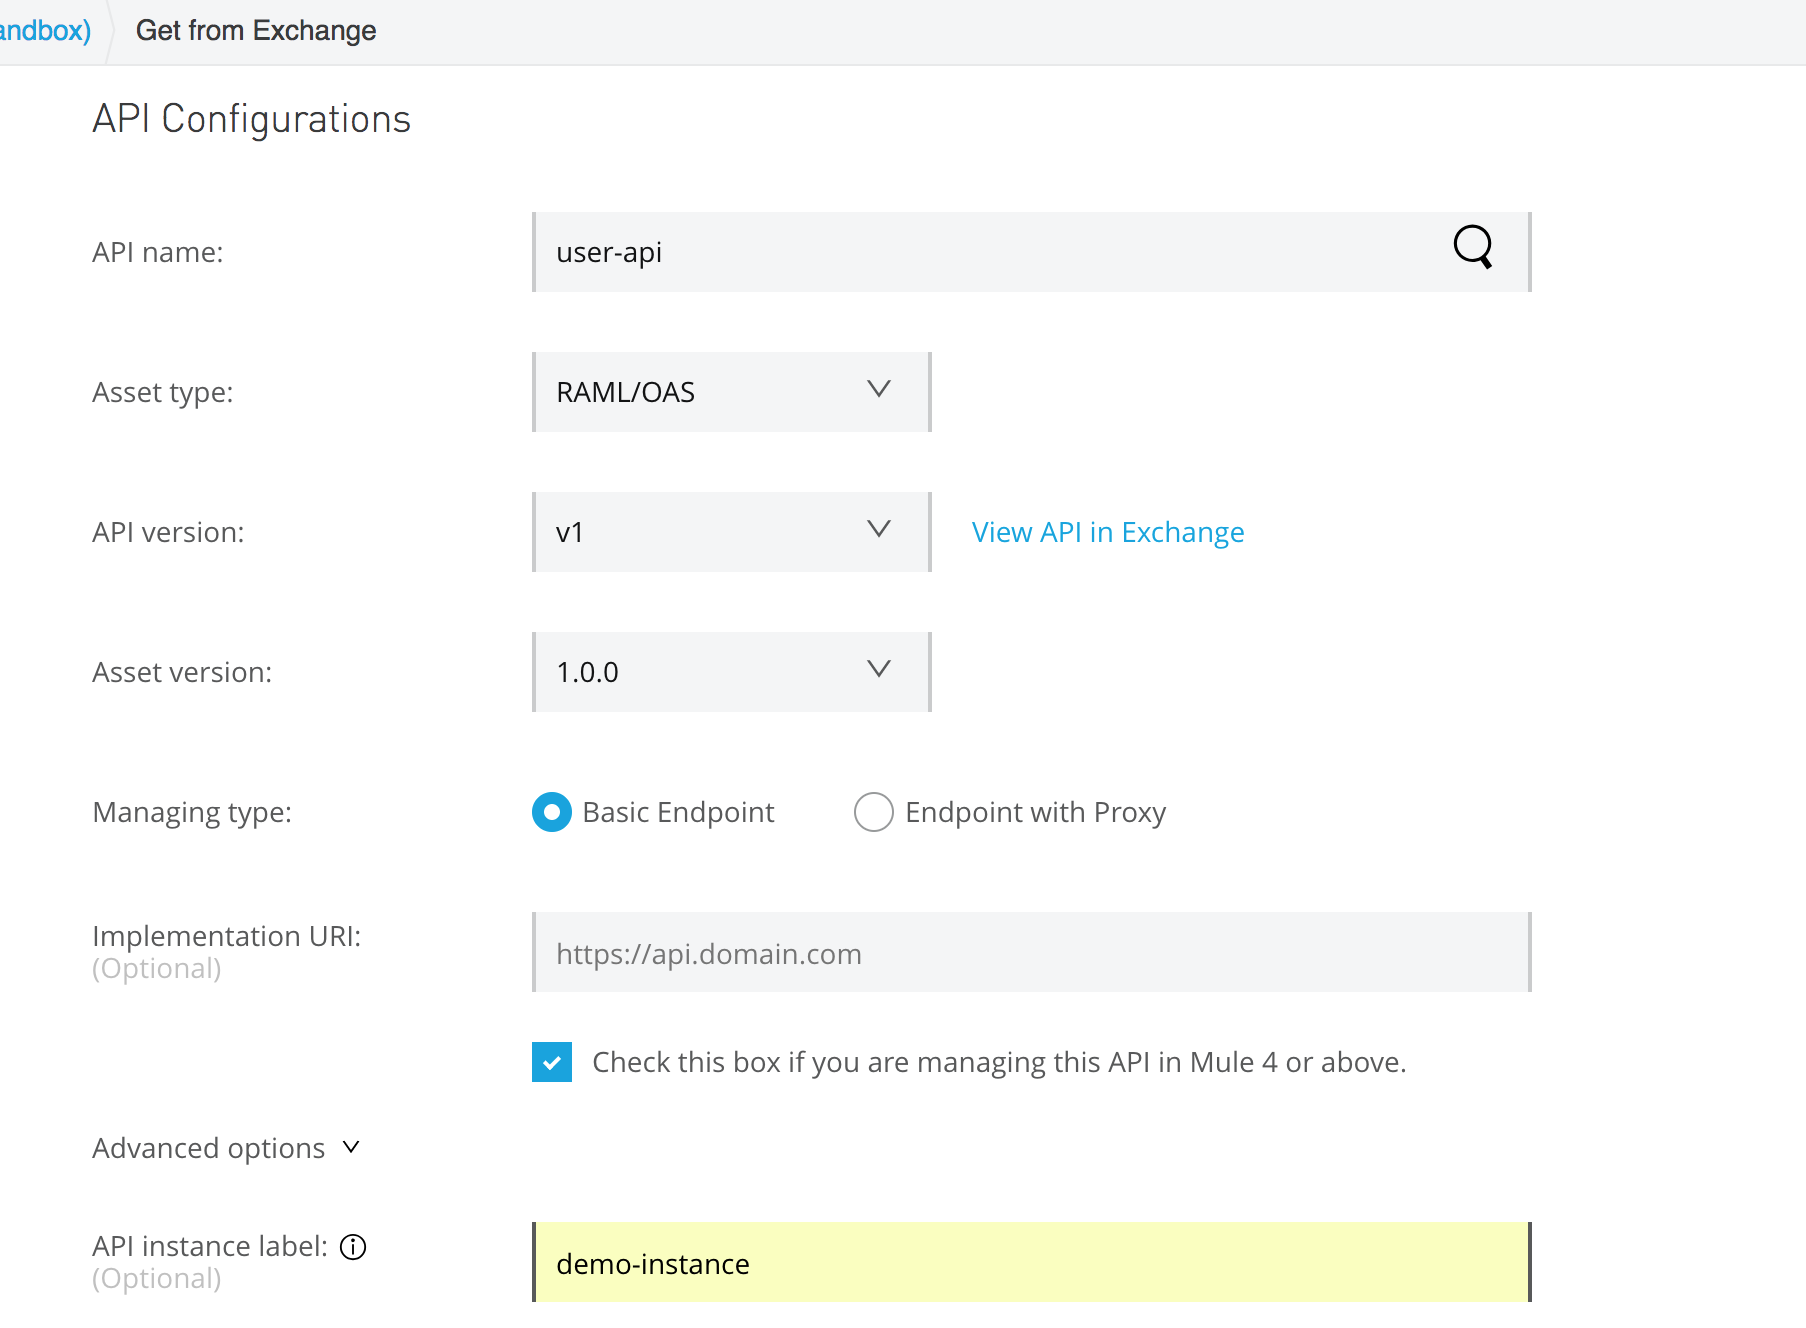
Here, I'm creating an API instance named demo-instance
Step 2
Once the API instance is created, you will get an API instance ID. Implement the API in Anypoint Studio. In the implementation, you configure API Autodiscovery and provide the API instance ID. By doing so, you are telling the Anypoint Platform to automatically wire that instance of the API to the implementation.
Step 3
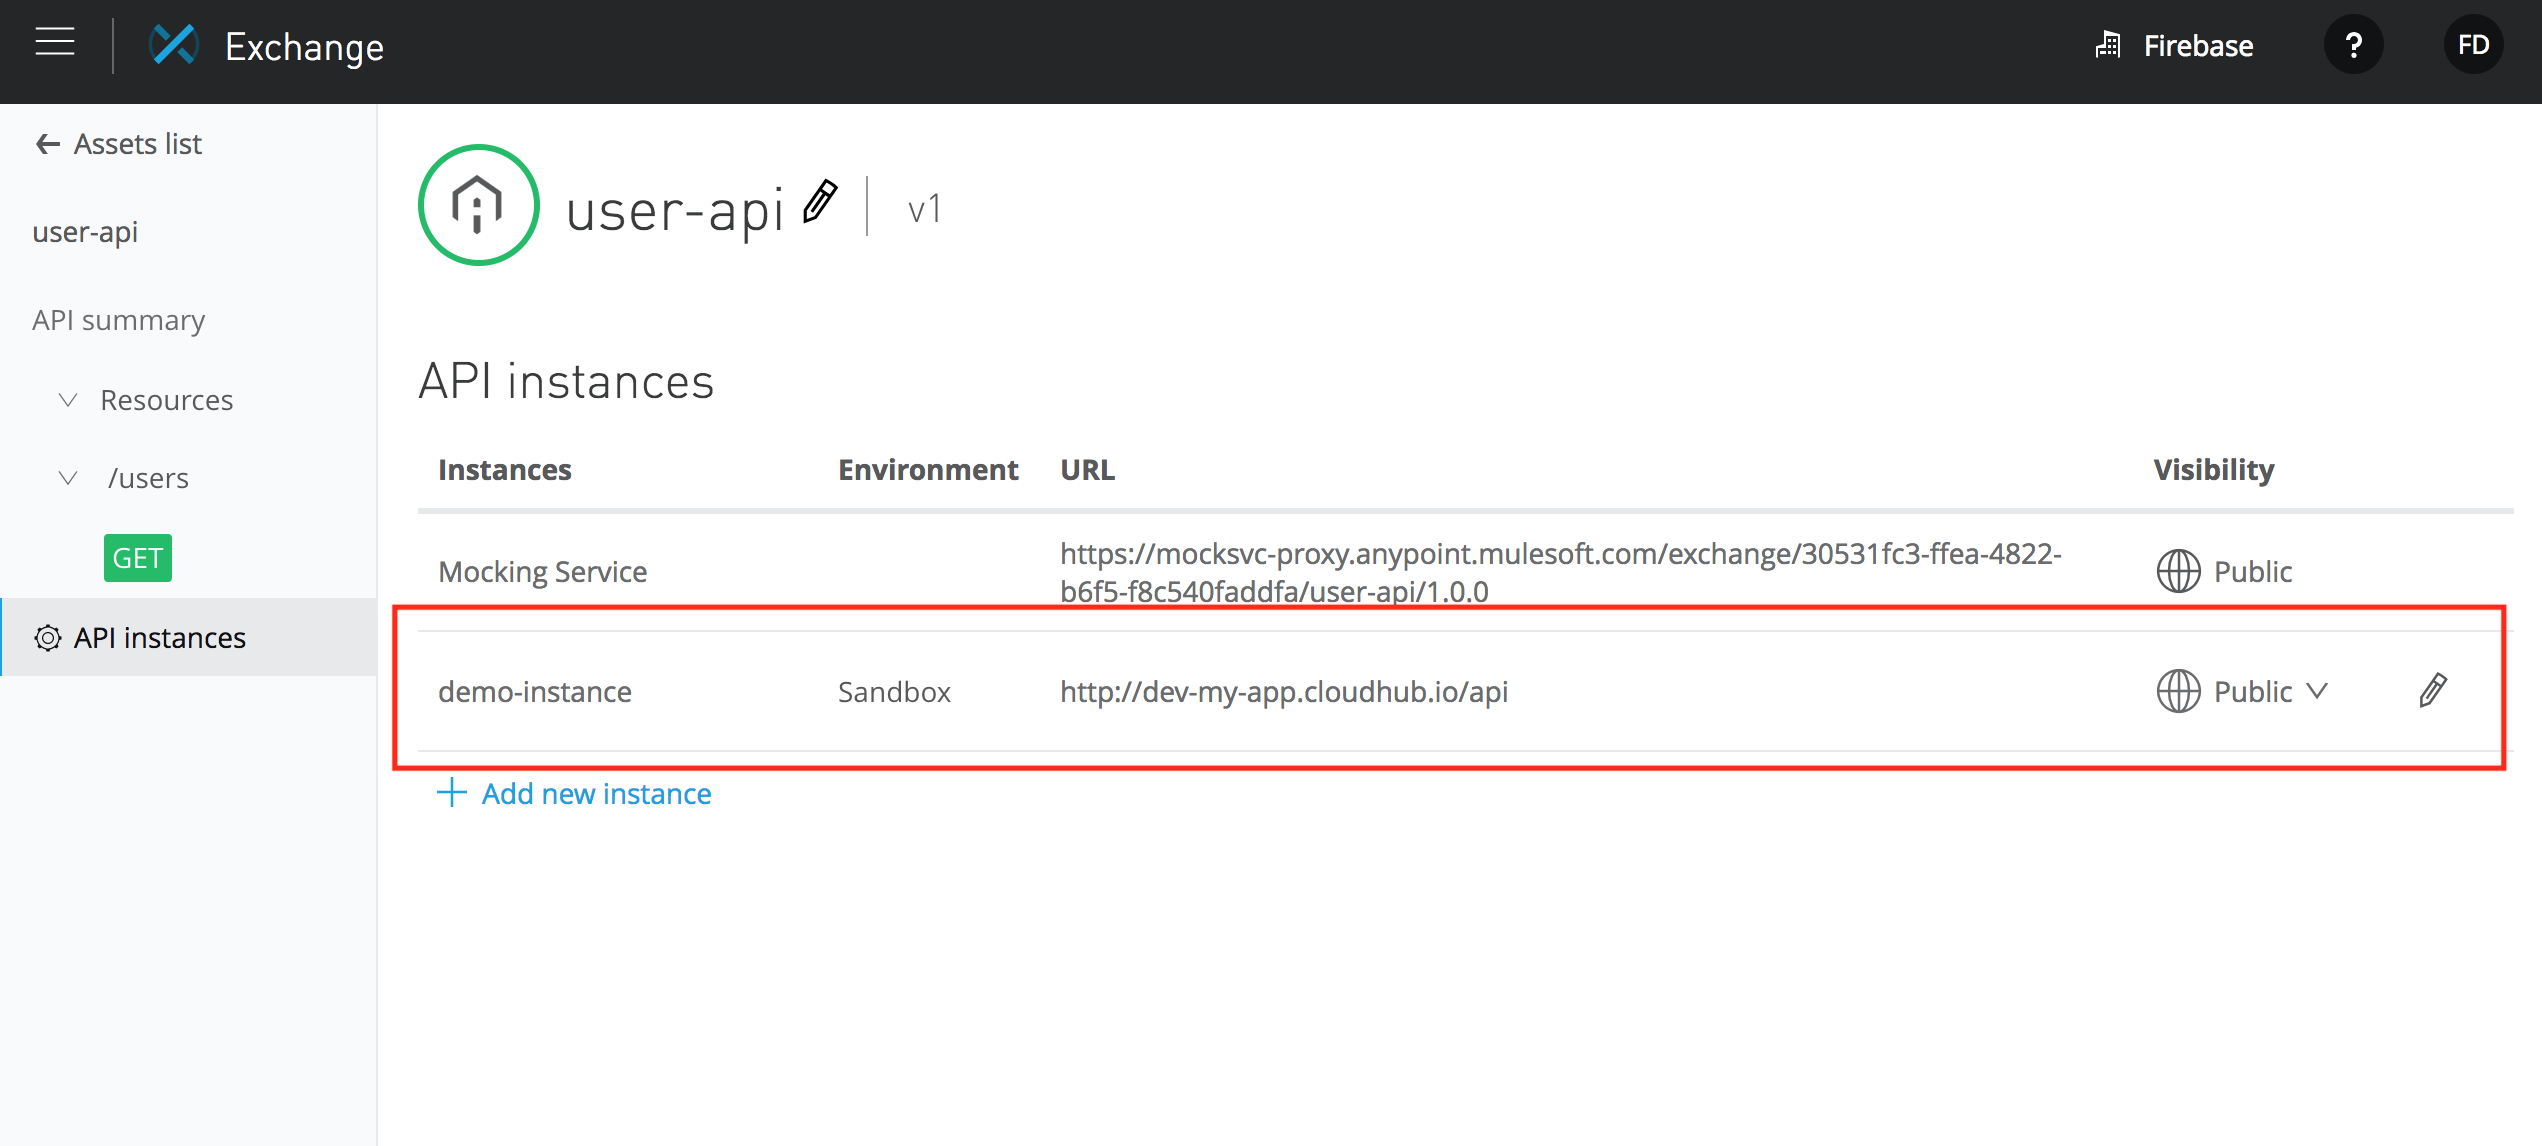
Once the application is deployed, copy the URL of the application. Now go the Exchange and look for the API asset. Navigate to API instances option of the API and configure the instance demo-instance with the implementation URL. Here is a snapshot:
Step 4
Once the API instances are defined, you can choose them to be executed for the API. Here is a screenshot:

In the figure above, we are executing the GET operation of the resource against the API instance chosen (demo-instance). All statistics for this operation will be registered in that particular instance.
Conclusion
In this tutorial, I have shown how to use the API Autodiscovery in Anypoint Platform 2. Now things have become much easier to understand and use with the release of the new version of the platform.
Source : dzone.com